
Monday, November 21, 2011
A Little Girl Christmas Card
I just love this card. I want to give one to every little girl I know! It was so easy to create and I am really reconsidering my Christmas card for this year. When I pick up I just smile. I know I seem to say that a lot lately but I have just been so inspired that I feel so good creating and I am really enjoy my craft!

 Supply List
I hope this card makes you smile, I just love it! Call or email me if you would like to make this card at a private workshop for you and your friends.


| Stamp Set | | Page |
| 123774 | Gift Givers (mini) | 39 |
| Paper/Ink | | |
| 122329 | Letters to Santa DSP | 186 |
| 119796 | Blushing Bride Card Stock | 176 |
| 100702 | Old Olive Card Stock | 177 |
| 100730 | Whisper White Card Stock | 180 |
| 119801 | Blushing Bride Stampin Write Marker | 176 |
| 100079 | Old Olive Stampin Write Marker | 177 |
| Punches | | |
| 118874 | 2 3/8” Scallop Circle | 210 |
| Other | | |
| 119267 | ½” Stitched-Poly Blushing Bride Ribbon | 194 |
| 102023 | Dazzling Diamonds | 201 |
| 100425 | Two Way Glue Pen | 206 |
I hope this card makes you smile, I just love it! Call or email me if you would like to make this card at a private workshop for you and your friends.
Saturday, November 19, 2011

ATTENTION STAMPIN' UP! CUSTOMERS!!! Start your holiday shopping Monday, Nov. 21, as Stampin' Up! launches their On-line Extravaganza. This event was a huge hit last year and promises more great savings and deals. The On-line Extravaganza ends Nov. 30.
Stay tuned for full details on my Blog starting Nov. 21--including a VERY SPECIAL ONE DAY SALE--ONLY ON NOV. 21!

Friday, November 18, 2011
I am sorry I am so late :)
Yes, I admit I sometimes miss an important date. yes I plan well but something always seems to get in the way! With Stampin' Up!'s Easy Event set it is easy (pun intended) to say you’re sorry for missing the very important date!
How cute is this card and so very cheery!


How cute is this card and so very cheery!


How cute is that little guy! Don't you love the sparkles :) Just a quick post today, I am preparing for a very busy week. I have 18 people coming to my house for Thanksgiving! I need to get organized soon.
Please leave a comment if you have any questions on how to make the amazing card!

Thursday, November 17, 2011
Craft Fair Fun
WOW! Have I been MIA or what! I can't believe I have gone so long without a post. Life has been so crazy and between workshops, classes, kids, husband, and work I just let my blog slip my mind. Sad I know and I promise to try harder to be more consistent :) A local pastor and his wife want to take a trip to Romania and the community has come together to help raise funds to send them on a journey that will touch many hearts! I was asked to donate some handmade items to sell and here is one I came up.


Supply List
Hope you enjoyed my fun little guys! They were so fun to make!


How cute are these little guys! Santa's Elves :) I just love them!


| Paper/Ink | | Page |
| 102584 | Garden Green | 179 |
| 102482 | Real Red | 177 |
| 100730 | Whisper White | 180 |
| 121045 | Basic Black | 180 |
| 119796 | Brushing Bride | 176 |
| Punches | | |
| 119883 | Full Heart Punch | 210 |
| 122361 | Pennant Builder | 213 |
| 124094 | 1” Square (mini) | 36 |
| 119858 | Boho Blossom | 210 |
| 117191 | Bird Builder Punch | 213 |
| 119847 | Ornament Punch | 210 |
| Other | | |
| 124134 | Cellophane Bag 1x8 (mini) | 11 |
| 113439 | Big Shot | 215 |
| 117335 | Polka Dots Embossing Folder | 219 |
| 104332 | Snail | 206 |
- To create the hat, emboss Garden Green paper & Whisper White with the Polka Dot embossing Folder. Using the Garden Green card stock punch out the scalloped Pennant punch. Using Whisper White punch out the snail flower from the Boho Blossoms Punch. Attach the flower to top of the hat.
- To create the face - Using Blushing Bride punch out the heart. Cut off the tops of the Heart to the "v" Attach the Hat. Punch out 2 Basic Black circles, 1 Real Red circle, & 1 Blushing Bride circle. Attach the 2 Black circles as the eyes.
- To create the beard - Emboss Whisper White with the Polka Dot embossing folder. Cut out the ornament. Cut off the top of the ornament. Using the embossed Whisper White cut out 1 wing from the Bird Builder punch. Flip the Paper over and punch another wing. Attach the "ornament to the lower half of the face. Attach the Real Red circle for the nose. On top of the Real Red nose place the wings to make the mustache. Attach the Blushing Bride nose.
- Using Blushing Bride cut out two wings from the bird builder punch. Attach behind the face.
- Fill the cellophane bags with candy of your choice. seal the bags. Attach a piece of sticky strip to the top of the sealed bag and then attach your Elf. Cut our one piece of Whisper White card stock using the 1" square and attach to the bag of the bag and Elf.
Hope you enjoyed my fun little guys! They were so fun to make!

Monday, November 7, 2011
Today is the last day to get your FREE MDS Downloads!
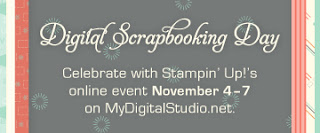
MY DIGITAL STUDIO EVENT & FREE DOWNLOADS Nov. 4 - 11! Learn more about digital scrapbooking and card making and get your free downloads (after completing a quick survey) at My Digital Studio.net!
I love this product and I have received my FREE files which are great!! Hurry get this offer today!

Last Chance for Big Shot Offer

Time is running out! This deal ends at 11:50PMmst on 11-11-11!
Benefits of Becoming a Demonstrator
Whether you just love to stamp, or you want to grow a successful, thriving business, the Stampin' Up! opportunity is the right fit for you. Stampin' Up! demonstrators enjoy many benefits, with just a few listed below:
- Product discount. Demonstrators get a 20 percent discount on all Stampin' Up! products, including stamp sets, paper, and accessories. It's a great way to support your love of stamping and paper crafting.
- Extra income. You'll earn extra income based on your sales and recruiting--how much extra income is up to you. Maybe you just want enough income to pay the electric bill every month, or maybe your goal is bigger--the monthly payment for your new car--it's your decision! Contact me for more information.
- Flexible schedule. This is your business, so you can put in as much (or as little) time as you'd like.
- Support from Stampin' Up! We love our demonstrators and it shows through our demonstrator support materials, including a monthly magazine, workshop ideas, and audio and video trainings on all kinds of topics available on our Demonstrator Web Site.
Wednesday, November 2, 2011
Alway's Grateful
It is offically now the holiday season for me! I am just counting down the days until I can put up my Christmas tree :) I love to send Thanksgiving cards to friends and family, probably because my birthday falls within the week of Thansgiving and I am a giver. This year my card just spoke to me lol! I am so excited to show you a sample from this set. It is beautiful and can be adapted for any card really! We will be making this lovely card at one of my workshops this weekend.


Hope you love this card as much as I do and you try it out for yourself!


| Stamp Set | | Page |
| 123789 | Always Thankful (Holiday mini) | 19 |
| Paper/Ink | | |
| 115318 | Soft Suede Card Stock | 180 |
| 101650 | Very Vanilla Card Stock | 180 |
| 103162 | More Mustard Classic Ink | 179 |
| 111837 | Pacific Point Classic Ink | 177 |
| 105216 | Pumpkin Pie Classic Ink | 177 |
| 102277 | Old Olive Classic Ink | 177 |
| Other | | |
| 122967 | 3/8 Taffeta Soft Suede Ribbon | 180 |
| 116824 | Petals A Plenty Embossing folder | 219 |
| 113439 | Big Shot | 215 |
| 102845 | Blender Pen | 203 |
| 104332 | Snail | 206 |
Hope you love this card as much as I do and you try it out for yourself!

Tuesday, November 1, 2011
November Hostess Special!

| If your workshop sales total is | You earn hostess dollars | It’s Good to Be the Hostess | Total Free Stampin’ Up! Merchandise | Plus, you earn full-priced items at 50% off | |
| $350 | $50 | + | $35 | $85 | --- |
| $400 | $65 | + | $35 | $100 | 1 item |
| $500 | $80 | + | $35 | $115 | 2 items |
| $750 | $120 | + | $35 | $155 | 3 items |
| $1,000+ | $160 plus 15% of amount over $1,000 | + | $35 | $195 plus 15% of amount over $1,000 | 4 items |
Contact me today to schedule a private workshop and get set to create for the holidays with all of the exciting hostess rewards you’ll receive!

Gobble, Gobble, Gobble!
First and for most I must wish my Mom & Dad a Happy Anniversary, On this day 39 years ago they married. And just 2 years and 3 weeks later I came along! Thank you for all you have done for me and still continue to do. I love you both very much.
Now onto the subject of crafting! This year we are hosting Thanksgiving dinner. I want a cute name plate for the table settings so I am starting my search. I was blog surfing and have found lots of examples of this particular craft so I decided to try it. Here is what I came up with.


2. Cut one 1½” x 11” strip of Cajun Craze
3. Cut one 1” x 11” strip of More Mustard
4. Cut one 1” x 11” strip of Cajun Craze
5. Cut two 1” x 11 strips of Chocolate Chip
6. Score all strips at ¼”
7. Fold using the “Mountain to Valley” techniques. Basically fold one up and one down until it is complete.
8. Cut all pieces, except the Chocolate Chip, so you have 10-12 mountains of each color.
9. Create a Rosette using the Chocolate Chip
10. Using sticky Strip attach all the 1 ½ x 11 strips together alternating colors.
11. Using a glue gun make a fan out of each folded strip
12. Glue the smaller fan onto the larger fan
13. Glue the Rosette onto the fan.
Turkey Face
14. With Chocolate Chip CS punch out a circle using the 1 ¾” Circle Punch (this will be the base for the face
15. Punch out two ¾” circles from Whisper White
16. Punch out two ½” circles from Basic Black. Glue onto the Whisper White
17. Attach to the Large Chocolate Chip Circle.
18. Create the Beak by folding Pumpkin CS in half and punch out with the scallop Petite Pennant. Be sure to move the paper down from the top so it stays together
19. Cut out the tongue with Cherry Cobbler using the straight pennant from the Petit Pennant punch. Attach to the inside of the scalloped beak.
20. Attach to face.
21. Using Pumpkin Pie cut out his throat piece. I used the scallop side of the Petite Pennant Punch.
22. Attach all pieces to the large Oval piece cut out of Chocolate Chip
To make his hat
23. Cut out on 1” circle from Chocolate Chip. Snip the circle in the middle and cut out a flap.
24. Cut out one 1” square and trim the sides to make it look like a top hat.
25. Attach the flap to the back of the hat piece.
26. Cut out a small strip of back and attach to the hat. Cut out a small piece of More Mustard and a small black Square. Glue them all together and stick on the black strip.
27. Attach to the Face
The Turkey legs
28. Cut out 4 Scallop Petite Pennant’s
29. Glue the bottom end of the Cellophane bags to them to form the feet.
30. Fill with Orange and Brown M&M’s and close the bags.
31. Attach to the turkey body with Sticky Strip.
How cute is that! If you have any questions at all please leave me a comment and I will get back to you as soon as I can! Happy Thanksgiving planning! With Thanksgiving just 3 weeks away I better get busy!

Now onto the subject of crafting! This year we are hosting Thanksgiving dinner. I want a cute name plate for the table settings so I am starting my search. I was blog surfing and have found lots of examples of this particular craft so I decided to try it. Here is what I came up with.


Paper/Ink | ||
100946 | More Mustard Card Stock | 179 |
119684 | Cajun Craze Card Stock | 179 |
121045 | Basic Black Card Stock | 180 |
105117 | Pumpkin Pie Card Stock | 177 |
100730 | Whisper White Card Stock | 180 |
102128 | Chocolate Chip Card Stock | 180 |
119685 | Cherry Cobbler Card Stock | 179 |
Punches | ||
122361 | Petite Pennants Builder | 213 |
119855 | Large Oval | 212 |
119850 | 1 ¾” Circle Punch | 212 |
119869 | ½” Circle Punch | 212 |
119873 | ¾” Circle Punch | 212 |
124094 | 1” Square Punch (Holiday mini) | 36 |
Other | ||
104294 | Sticky Strip | 206 |
104332 | Snail | 206 |
124134 | Cello Bags (Holiday mini) | 11 |
M&M’s | ||
Glue Gun |
Turkey Body:
1. Cut one 1½” x 11” strip of More Mustard2. Cut one 1½” x 11” strip of Cajun Craze
3. Cut one 1” x 11” strip of More Mustard
4. Cut one 1” x 11” strip of Cajun Craze
5. Cut two 1” x 11 strips of Chocolate Chip
6. Score all strips at ¼”
7. Fold using the “Mountain to Valley” techniques. Basically fold one up and one down until it is complete.
8. Cut all pieces, except the Chocolate Chip, so you have 10-12 mountains of each color.
9. Create a Rosette using the Chocolate Chip
10. Using sticky Strip attach all the 1 ½ x 11 strips together alternating colors.
11. Using a glue gun make a fan out of each folded strip
12. Glue the smaller fan onto the larger fan
13. Glue the Rosette onto the fan.
Turkey Face
14. With Chocolate Chip CS punch out a circle using the 1 ¾” Circle Punch (this will be the base for the face
15. Punch out two ¾” circles from Whisper White
16. Punch out two ½” circles from Basic Black. Glue onto the Whisper White
17. Attach to the Large Chocolate Chip Circle.
18. Create the Beak by folding Pumpkin CS in half and punch out with the scallop Petite Pennant. Be sure to move the paper down from the top so it stays together
19. Cut out the tongue with Cherry Cobbler using the straight pennant from the Petit Pennant punch. Attach to the inside of the scalloped beak.
20. Attach to face.
21. Using Pumpkin Pie cut out his throat piece. I used the scallop side of the Petite Pennant Punch.
22. Attach all pieces to the large Oval piece cut out of Chocolate Chip
To make his hat
23. Cut out on 1” circle from Chocolate Chip. Snip the circle in the middle and cut out a flap.
24. Cut out one 1” square and trim the sides to make it look like a top hat.
25. Attach the flap to the back of the hat piece.
26. Cut out a small strip of back and attach to the hat. Cut out a small piece of More Mustard and a small black Square. Glue them all together and stick on the black strip.
27. Attach to the Face
The Turkey legs
28. Cut out 4 Scallop Petite Pennant’s
29. Glue the bottom end of the Cellophane bags to them to form the feet.
30. Fill with Orange and Brown M&M’s and close the bags.
31. Attach to the turkey body with Sticky Strip.
How cute is that! If you have any questions at all please leave me a comment and I will get back to you as soon as I can! Happy Thanksgiving planning! With Thanksgiving just 3 weeks away I better get busy!

Subscribe to:
Posts (Atom)


