Monday, May 23, 2011

3x3 Travel Album

I was so excited when Stampin! Up came out with the Travel Log stamp set. I have our Christmas photos from our great trip to San Francisco, CA. It was the first time we went to visit our family down there and my mother-in-law makes a great tour guide. So I made this little album for her. I just need to add the photos and stick this book in the mail.

Supply List
Paper:
119926 3x6 Chocolate Chip
119950 3x6 Tempting Tourquoise
117166 Newsprint
Stamps:
123082 Travel Log
120651 Word Play
123097 Pretty Postage
Punches:
119858 Boho Blossoms Extra-Large
119851 Curly Label Extra-Large
122344 Postage Stamp
Extras:
119246 Basic Rhinestones
109025 Whisper White Ribbon
104332 SNAIL Adhesive


Saturday, May 21, 2011

Prom!

**Warning, this post is photo heavy! ** Well my baby girl has hit another milestone, her prom. I can't believe that 18 years has gone by so fast! I have tears in my eyes as I type this. Not sure how I am going to get through her scrapbook with dry eyes.
Anyway, back to the subject of the post! Getting her ready was super entertaining! We spent the entire morning and afternoon getting her ready for the dance. In comparison, her brother only spent 20 minutes getting ready. But it was a ton of fun getting to spend this day with her.

I ended the evening at the casino with a dear friend who was fortunate enough to be here with us. I had a successful outing at the casino that has paid for my trip to the convention so I now get to use my convention savings on new Stampin Up!! You can't beat that!

We started the morning with coffee and muffins from Starbucks. We headed to the Bellevue Gene Juarez where she got her hair and makeup done. What an amazing group of woman. They are so talented and sweet! They made her day perfect.


We returned home to get her dressed, pick up her brother, and head over to her boyfriends house to meet the group for pre-prom photos. Of course I had to get a brother and sister photo before we took off. How cute are they!
I warned you, here are more photos of the kids. I find it entertaining that my children's names are Kayla and Cody and their dates names were Kayla and Cody!


Friday, May 20, 2011

Crafty Goodness!

I just held my first monthly crafty get together! We had a great time. We made two cards and a 1/2 dozen of flowers! I can't wait for next month. We will have a few more gals join us and we will be focusing on getting ready for the summer season to bless us!


Tuesday, May 17, 2011

Ghirardelli Chocolate Square box

Thanks to Creations on Paper for the initial instructions of this box. Once I saw her pictures it was easy for me to recreate!

Supplies
100079 Old Olive cardstock cut at 8-1/2" x 3-11/16" 
100459 Pretty in Pink
117155 Designers Series Patterns Stack Bright’s collection
Extra’s 114950 Define your life stamp set
119246 Jewels Basics Rhinestones
117335 Perfect Polka Dots textured impressions folder for Big Shot
109032 Pretty in Pink Ribbon
113439 Big Shot
100908 Chocolate Chip Ink
104294 Sticky Strip
104430 Stampin dimensionals

Step. 1 Make Box Paper
 
  1. Cut Old Olive cardstock at 8-1/2" x 3-11/16" 
  2. Score it crosswise at 2", 4", 6" and 8"
  3. Cut along the score line for 2, 4, & 6 inch up to the score line.
  4. Score it lengthwise at 1" and 2".
  5. Cut on the lengthwise side up to the last tab (6 inches from the bottom)
  6. Cut the at the score marks to remove the outer tabs
  7. Apply Sticky strip to tabs as shown
  8. Put box together  
  9. Cut one strip of Pretty in Pink cardstock at 1 x 11
  10. Cut Pretty in Pink with die cut machine and square’ish piece cut 2 pieces at 3 ¼ & Cut DSP with die cut machine and square’ish piece cut 2 pieces at 2 ¾
     
Step 2. Build the Lid & Bottom of box.
Adhere DSP to Pretty in Pink paper using snail adhesive

Step 3. Build the closure band.
Run the 1 x 11 strip of pretty in pink through the Big Shot in the Perfect Polka Dots embossing folder.
Score the closure band @
2 ¼ 
3 ¼
7 10/16
8 11/16
Apply small piece of sticky strip to one end
Step 4. Adhere top and bottom to box
Apply sticky strip to the top & bottom of box.
Adhere bottom first to the box
Line up the lid and apply to box.
Step 5. Fill with up to 3 Ghirardelli chocolate pieces
Step 6. Adhere the closure band
Step 7. Create your tag
Stamp “Favorite” definition on a piece of Pretty in Pink cardstop.
Cut out with punch or decorative sissors
Cut a larger piece of DSP to match
Adhere the two together using dimensionals
Adhere to belt of card.
Tie your bow attach Rhinestone to the middle and adhere to box. 

Please let me know if you have any questions!


Wednesday, May 11, 2011

Come join me for a night of crafting!

We are getting ready to kick off our new stamp & crafting club and would love to have you join us! I love paper crafting and can't wait to share it with you. This club is for everyone! If you have never stamped or paper crafted before don't be shy! I will walk you through every step of the way, plus if you join the club you will take home instructions on how to recreate what we do in class. If you are more experienced I will show you new techniques that that you can incorporate to your crafty arsenal. What better way to start learning then a night out with girlfriends.
  • Join the club and the class is $25.00 (You will receive hostess perks, an instruction book, and instructions for each project)
  • Come to one class and the cost is $15.00 (or class is free if you purchase $30.00 from a current catalog)

More details can be found HERE. Just to give you an idea of the types of things you will be making here are a few photos!


Sunday, May 8, 2011

Mother's Day!

I have always treasured the Mother's Day gifts my children made me in Elementary School but once they both graduated to Junior High School these gifts no longer appeared discreetly on my table. Just one of the many things you miss as your children grow up. My dear husband took over the gift buying role and he slid into perfectly! I was always happy and teary eyed when I would get the sweet card and breakfast cooked for me in the morning. Of course he would always spoil me in the gift department as well.

This year was a little different. I woke up to coffee brewing and the smell of bacon in the kitchen. Of course this got me motivated to get out of bed in 
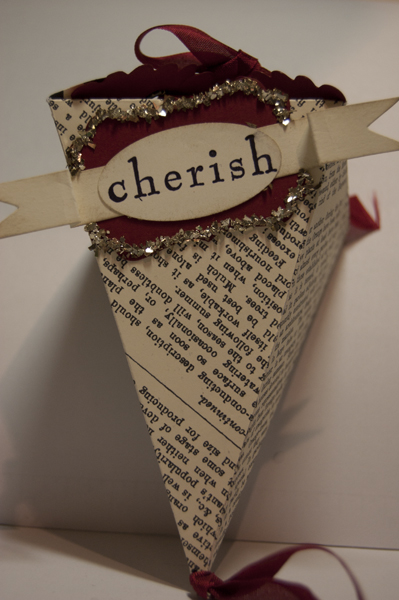
anticipation of my yummy breakfast.  As I come upstairs my daughter calls me into her room (she still can't walk without the crutches) and hands me this:

You see my daughter has matured so much over the last year. She has a very good job, which she loves and they treat her fantastic. She is also a very smart, talented, & ambitious young woman. In the days before Mother's Day she kept telling me that I was going to LOVE LOVE LOVE my gift and she couldn't wait for me to get it. I would ask for hints and she would tell me she couldn't tell me where she purchased my gift because it would give it away. See this is her payback to me as I do this to her every year for her birthday. It is a fun teasing and we love it. I open the little blue box and discover this:

I am so proud of my daughter; she listens and pays attention to things you have said in passing. For me it was when she received her first little blue box for her 18th birthday from her Aunt Missy. I remember turning to my husband (half joking and, well let's be honest, half serious) and saying I am in my late 30’s and I never have received one of those little blue boxes filled with yummy goodies. He laughed and said shall we go look in your craft room? Point taken I said. Well she must have heard because she has blessed me with my first blue box. I love my daughter! 

Makayla thank you for being more than I could ask for in a young woman. And thank you to my son, Cody, for being a smart, funny, & talented young man. Your heart is as big as your smile, and you let the whole world know it.

You two are my world and I can't wait to see what you will offer this world in the years to come.

Sunday, May 1, 2011

Bloomsday Weekend

Bloomsday is a long standing tradition in Spokane, WA and I only ran the race once the entire time I lived there. Strange I know because I go back every year to run it. This year my sister, cousin, & I decided to dress ourselves up! Of course how can I pass up a chance to use Stampin Up! so we created the cutest princess fairy tiaras.

What we didn’t realize at the time was they did look a little like bridal veils but the HUGE butterfly on the front should have given it away! Lots of people assumed we were getting married instead of being fairies but that's ok. I was impressed that it survived on my head for as long as it did. In fact I had a hard time getting it out of my heard!
Before:
 After:

Thanks to my mom and sister for a fun weekend crafting, racin, and taking my nephew on his first gondola ride! On another crafting note :) I got to visit a new Hobby Lobby store and let me just say that my husband is thankful that we don't have one here. It is bad enough that JoAnn's and Michal's are right across the street from each other here!!